


Simple Steps to Clean Burnt-On Residue from Your Cooktop
Posted on 28/09/2025
Simple Steps to Clean Burnt-On Residue from Your Cooktop
Every home chef has faced the stubborn problem of burnt-on residue sticking to their cooktop. Whether it's a ceramic glass stove or a traditional gas range, cleaning a cooktop marred by baked-on spills can seem daunting. However, with the right methods and materials, you can restore your cooking surface to its original shine quickly and efficiently. In this comprehensive guide, you'll learn simple, effective steps and expert tips to clean burnt food from various cooktop types.
Why Does Burnt-On Residue Accumulate on Cooktops?
Before diving into the best methods to remove burnt-on stains, it's important to understand what causes them in the first place. Burnt-on residue accumulates when food spills are exposed to high heat, causing sugar, protein, and fat molecules to carbonize and stick to the cooktop surface. If not addressed swiftly, these spills harden and become much more challenging to clean.
- Overboiling pots and pans
- Oil splatters from frying or sauteing
- Sugar burns from desserts
- Regular use without frequent cleaning
Accumulated residue not only makes your stove look unsightly but can also affect its functionality, reducing heat efficiency and potentially causing unpleasant odors.
Essential Supplies for Cleaning Cooktops
Gathering the right cleaning tools is your first step toward a sparkling cooktop. You don't need fancy gadgets--a few household staples are more than enough.
- Soft microfiber cloths
- Non-abrasive sponges
- Plastic or silicone scraper
- Baking soda
- White vinegar
- Dish soap
- Spray bottle (for solutions)
- Commercial cooktop cleaner (optional, glass/ceramic safe)
- Gloves (to protect sensitive skin)
Note: Avoid steel wool or metal scrapers, as these may scratch delicate surfaces on glass or ceramic cooktops.
Step-By-Step Guide: How to Remove Burnt-On Residue from Your Cooktop
Step 1: Ensure Safety First
Before you begin deep cleaning your cooktop, always make sure the appliance is completely cool to prevent burns or damage to yourself and the cooktop surface. If you used your stove recently, wait at least 30 minutes for it to cool down.
Step 2: Remove Loose Debris
Use a dry cloth or paper towel to wipe away any food crumbs, loose particles, or grease spills from the surface. This prevents scratching when you move on to tougher stuck-on residue.
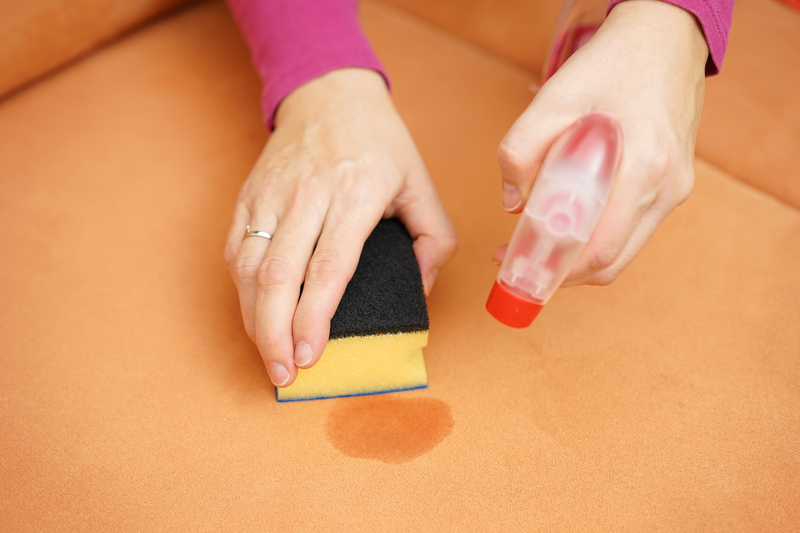
Step 3: Soften the Burnt-On Stains
For hardened, baked-on messes, it's crucial to soften them before scrubbing. Here's how:
- Mix a solution of equal parts warm water and white vinegar in your spray bottle.
- Spray generously over the burnt-on residue.
- Cover the area with a damp microfiber cloth and let it sit for 10-15 minutes.
Tip: For extra-tough stains, sprinkle a layer of baking soda over the cooked-on spills before covering with a damp cloth. The baking soda will help break down stubborn grime.
Step 4: Gently Scrape Away Residue
After soaking, use a plastic or silicone scraper at a shallow angle to gently remove softened residue. Work slowly to avoid scratching the cooktop.
- For ceramic or glass cooktops, never use metal tools.
- For induction stoves, the same care applies, since their cooking surfaces are often glass as well.
- On gas ranges, you can use a plastic scraper, but avoid damaging the metal grates or burners.
Step 5: Scrub with Gentle Cleaners
Create a paste of baking soda and a few drops of water if stains persist. Apply the paste to the remaining burnt residue and scrub with a non-abrasive sponge in a circular motion.
If you own a commercial cooktop cleaner designed for your stove type, follow the product's instructions for best results.
Step 6: Rinse and Wipe Clean
Once stains are lifted, use a clean cloth dampened with warm water to wipe away any remaining cleaning solution or residue. Repeat until the surface is completely free of grime and cleaner.
Step 7: Polish and Dry
For an extra sparkle, buff the cooktop with a dry microfiber cloth, using small, circular motions. This restores shine and removes any streaks left by cleaning solutions.
Special Tips: Cleaning Different Types of Cooktops
1. Glass & Ceramic Cooktops
Glass and ceramic surfaces require special care to prevent scratching. Always:
- Use only non-abrasive scrubbing pads and soft sponges.
- Never use harsh chemical cleaners or strong abrasives.
- Use razor blade scrapers only if recommended by the manufacturer, and at the correct angle.
2. Gas and Electric Coil Cooktops
For gas ranges:
- Remove burner grates and soak them in warm, soapy water.
- Scrub grates with a brush for heavy burnt-on food particles.
- Remove and clean drip pans separately.
- Dry thoroughly before reassembling to avoid electric hazards.
3. Induction Cooktops
Induction cooktops have smooth surfaces similar to glass stoves. Use only products and scrapers designed specifically for induction cooktops. Never use products containing chlorine bleach or ammonia.
Additional Tips for Preventing Burnt-On Residue
- Wipe up spills promptly: Tackle food spills as soon as they happen (once safe to touch), preventing stains from baking on.
- Avoid high heat for delicate dishes: Cooking at lower temperatures reduces the likelihood of spills burning onto your cooktop.
- Use stovetop protectors: Silicone mats or liners can catch drips and make regular cleaning easier.
- Regularly clean your cooktop: A quick daily wipe-down keeps buildups in check.
DIY Solutions for Especially Stubborn Burnt Residue
If the above methods aren't quite doing the trick, consider these advanced home remedies for tough burnt-on messes.
Lemon and Baking Soda
- Cut a fresh lemon in half and dip it in baking soda.
- Rub the lemon directly over the burnt spot. The acid helps break down carbonized stains, and the baking soda acts as a gentle abrasive.
- Let the mixture sit for 10 minutes before wiping clean.
Hydrogen Peroxide and Baking Soda
- Mix hydrogen peroxide and baking soda into a paste.
- Apply to stubborn stains and let sit for 15 minutes.
- Scrub gently and rinse thoroughly.
Note: Always spot-test new cleaning solutions on a small, inconspicuous area of your cooktop before applying them widely.
What to Avoid When Cleaning Burnt-On Residue from Your Stovetop
- Avoid abrasive pads or steel wool: These can permanently scratch and dull your cooktop.
- Do not use oven cleaners: Most oven cleaners are too caustic for glass or ceramic cooktops.
- Don't use excessive water on electric components: Always use a damp, not soaking, cloth to prevent electrical hazards.
Frequently Asked Questions about Cleaning Burnt Cooktops
Can You Clean Burnt-On Stains from Your Cooktop Without Chemicals?
Yes! Many common household items--such as vinegar, baking soda, or lemon--are effective for removing burnt-on residue without the need for strong chemicals.
How Often Should You Clean Your Cooktop?
Ideally, wipe down your cooktop daily or after each heavy cooking session. Deep cleaning and stain removal should be tackled as soon as spills occur, but a thorough cleaning once a week helps maintain the cooktop's condition.
Is it Safe to Use a Razor Blade on a Glass Cooktop?
Only use a razor blade scraper specifically designed for glass cooktops, and always follow the stove manufacturer's guidelines. Use the blade at a very shallow angle to avoid scratching.
Conclusion: Enjoy a Spotless, Efficient Cooktop
Tackling burnt-on residue on your cooktop doesn't have to be a stressful chore. With these simple techniques, you can effortlessly eliminate even the most stubborn stains and keep your stove looking as good as new. Regular upkeep, prompt spill cleanup, and the right materials are the keys to maintaining a sparkling, functional cooktop for years to come.
Remember: The next time burnt food threatens to ruin your cooking surface, just refer back to these easy, effective cleaning steps--and enjoy your clean kitchen with pride!
Related Resources
- Consumer Reports: Cleaning Tips for Stovetops
- Good Housekeeping: How to Clean Your Stovetop
- HGTV: How to Clean a Cooktop (Step-by-Step)
Stay tuned for more kitchen cleaning hacks and home maintenance tips to make cooking and cleaning an absolute breeze!